Overview
Scheduling a call is one of the features within your campaign settings that allows customizable dates and additional planning when deploying your outbound projects. Since the scheduling option exists within campaign settings, you can have the same project running under different campaigns, each with its own timing. If you want to learn how to create and manage outbound projects, visit the “Creating an Outbound Project” section. For campaign features and setup, refer to the “Project Campaigns” section.How to Schedule a Call
thinkrr
thinkrr
1. Create or open an outbound project
- From the Home screen, either:
- Click Add New Project to create a new outbound project, or
- Select an existing outbound project from your list.
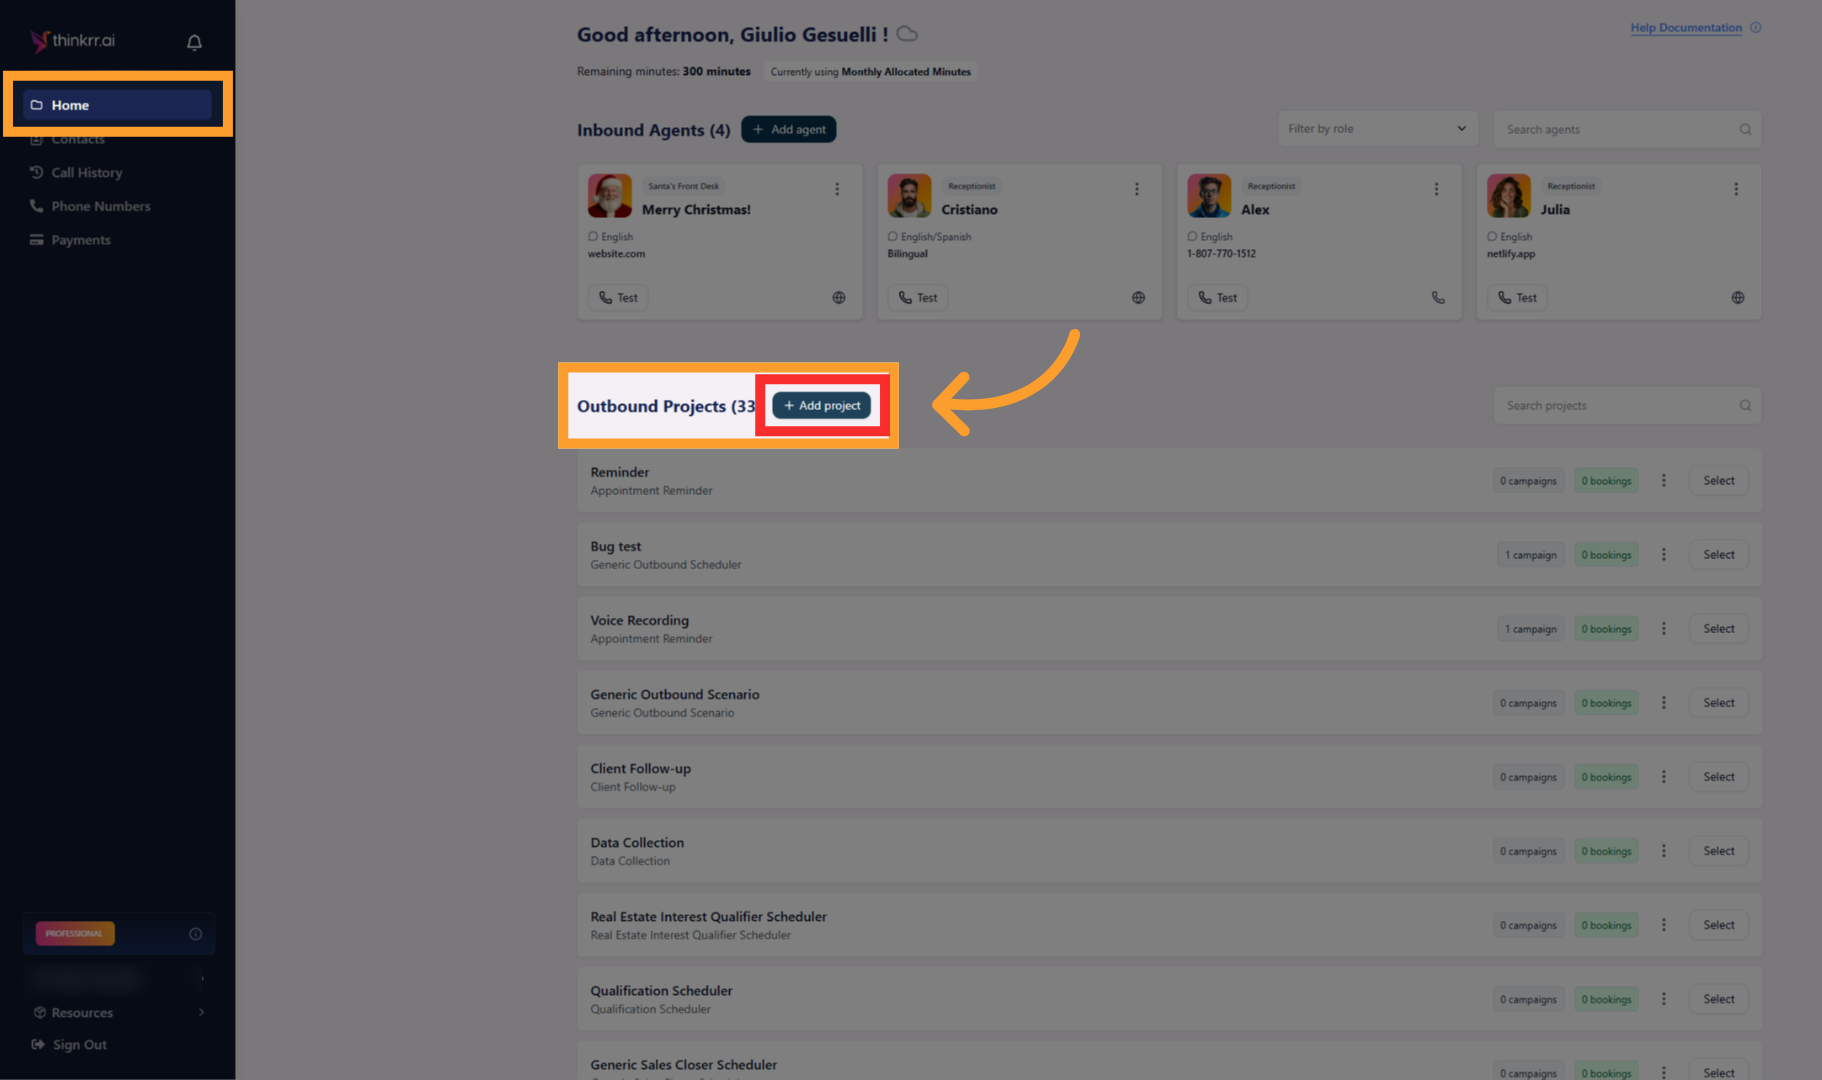
- Once opened, you’ll be inside the project workspace.
2. Navigate to Project Campaigns
- Inside the project, click the Project Campaigns tab.
- This is where all campaigns for the project are created and managed.
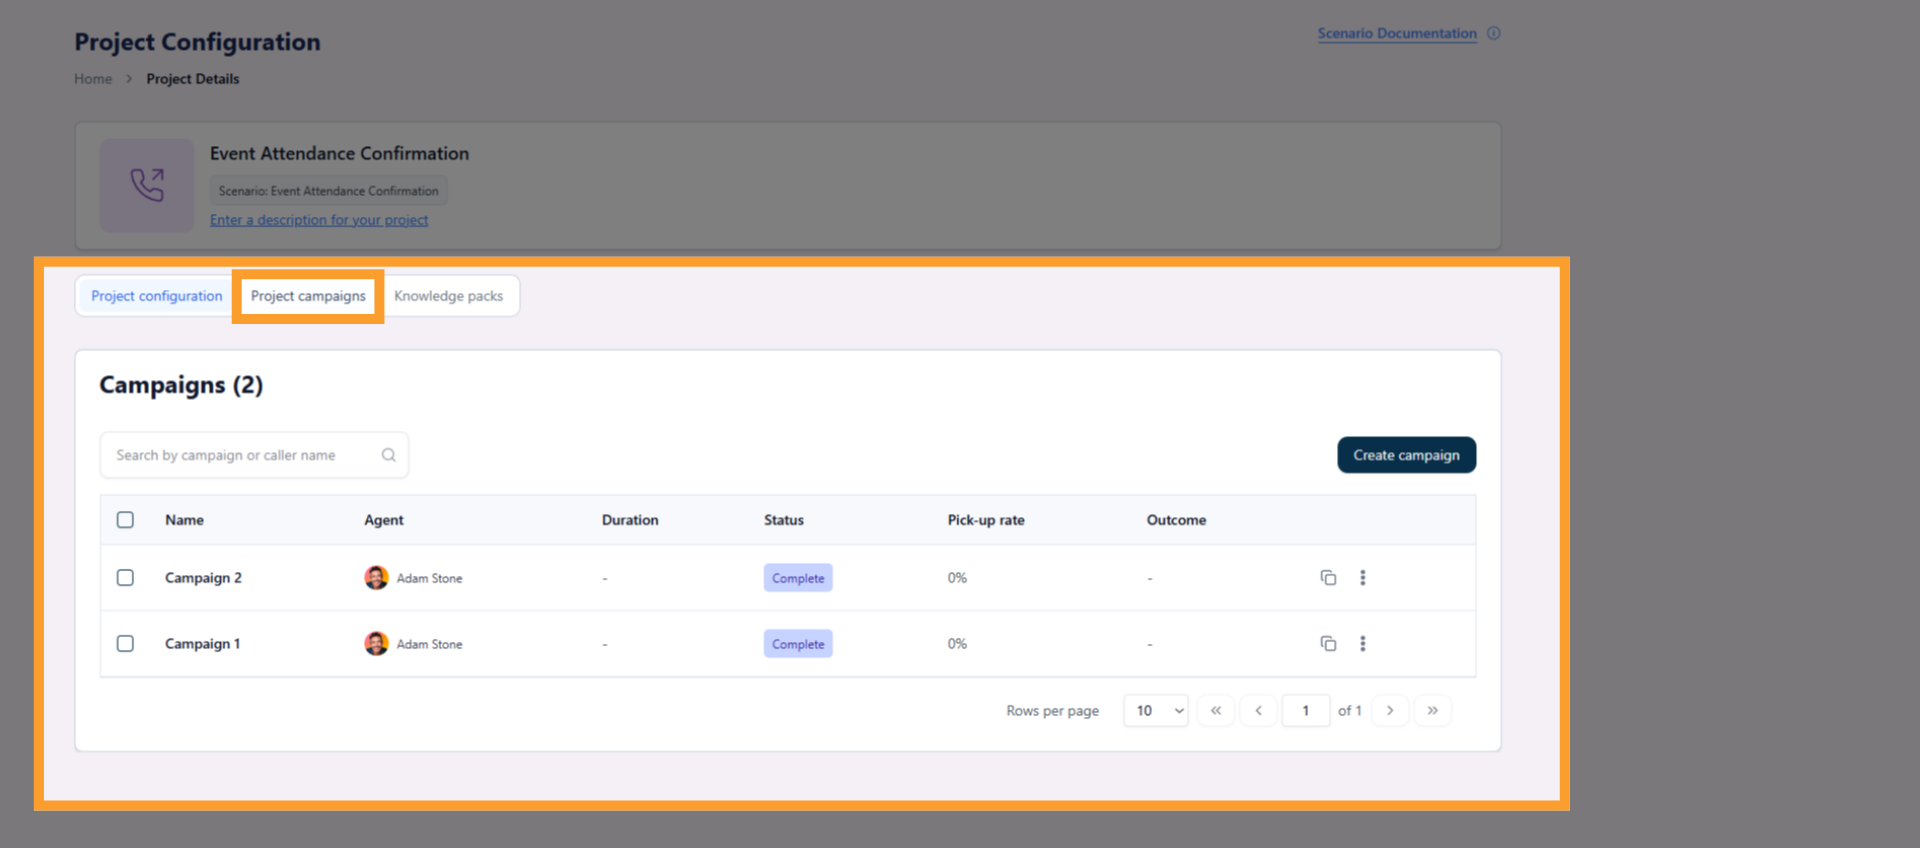
3. Create or open a campaign
- Either:
- Click Create Campaign to add a new campaign, or
- Click an existing campaign to edit it.

- Opening a campaign takes you into the campaign workspace, which includes:
- Campaign Configuration
- Contacts
- Knowledge Packs
4. Open Campaign Settings
- From inside the campaign workspace, click Campaign Settings in the top-right corner.
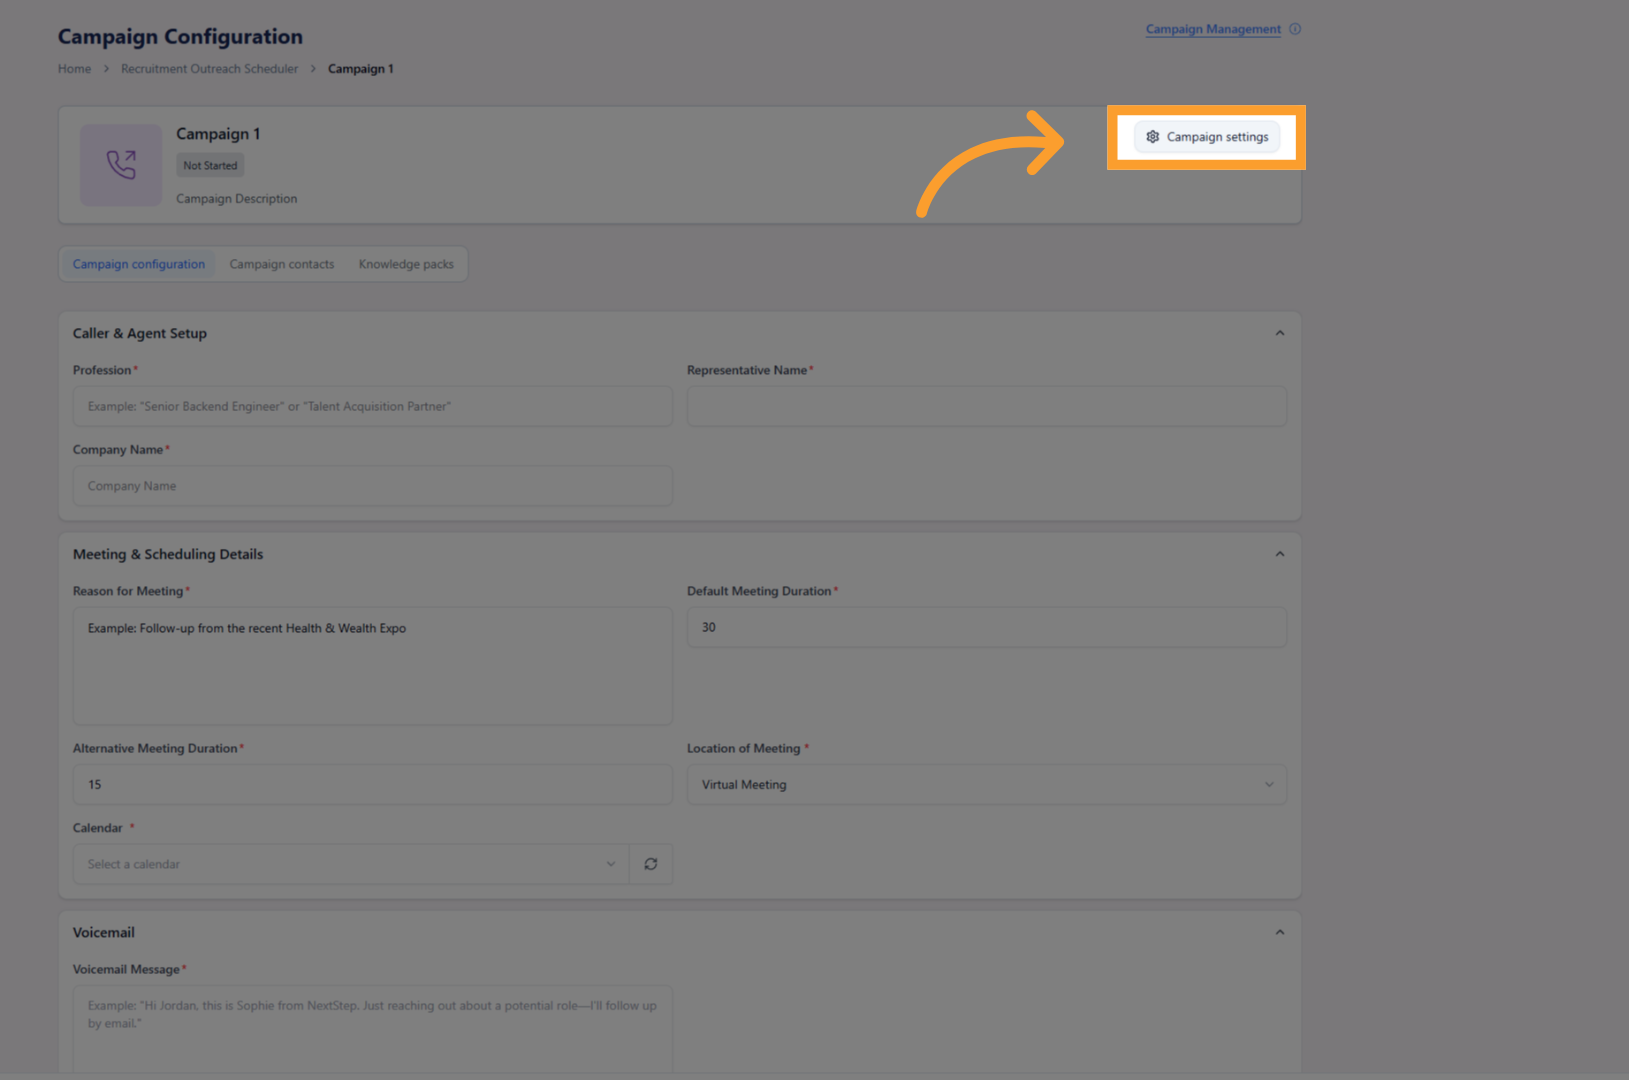
- This opens the Campaign Settings panel, which contains four tabs:
- Core Settings – agent identity and voice selection
- Scheduling – when and how long calls should run
- Call Settings – call behavior and handling rules
- Voice Settings – responsiveness and interruption behavior
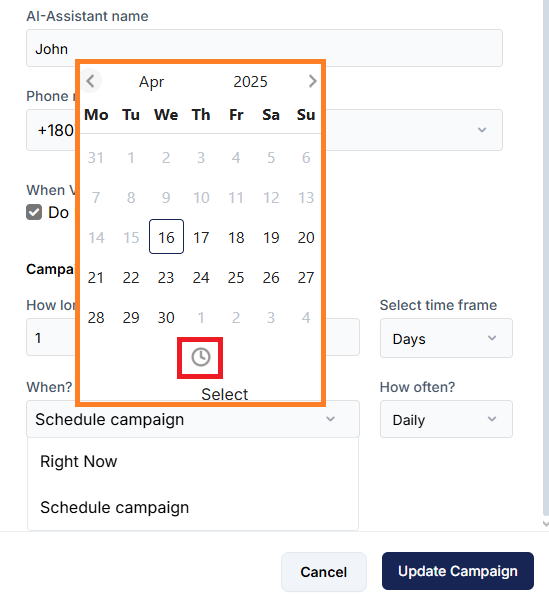
5. Schedule the campaign
- Click the Scheduling tab inside Campaign Settings.
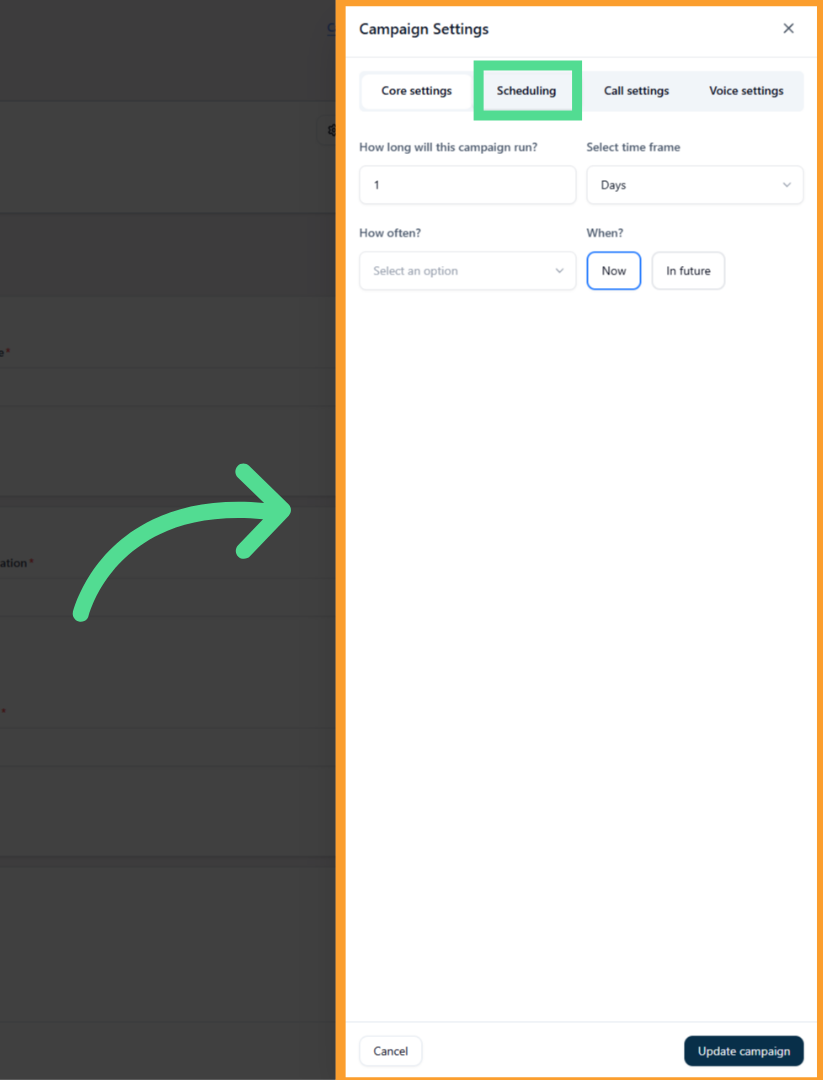
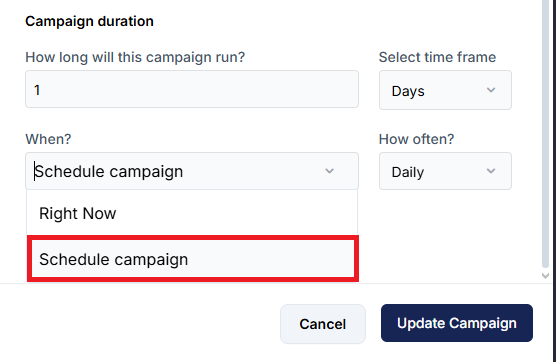
- Under When?:
- Select ‘In Future’
- Choose a start date from the calendar
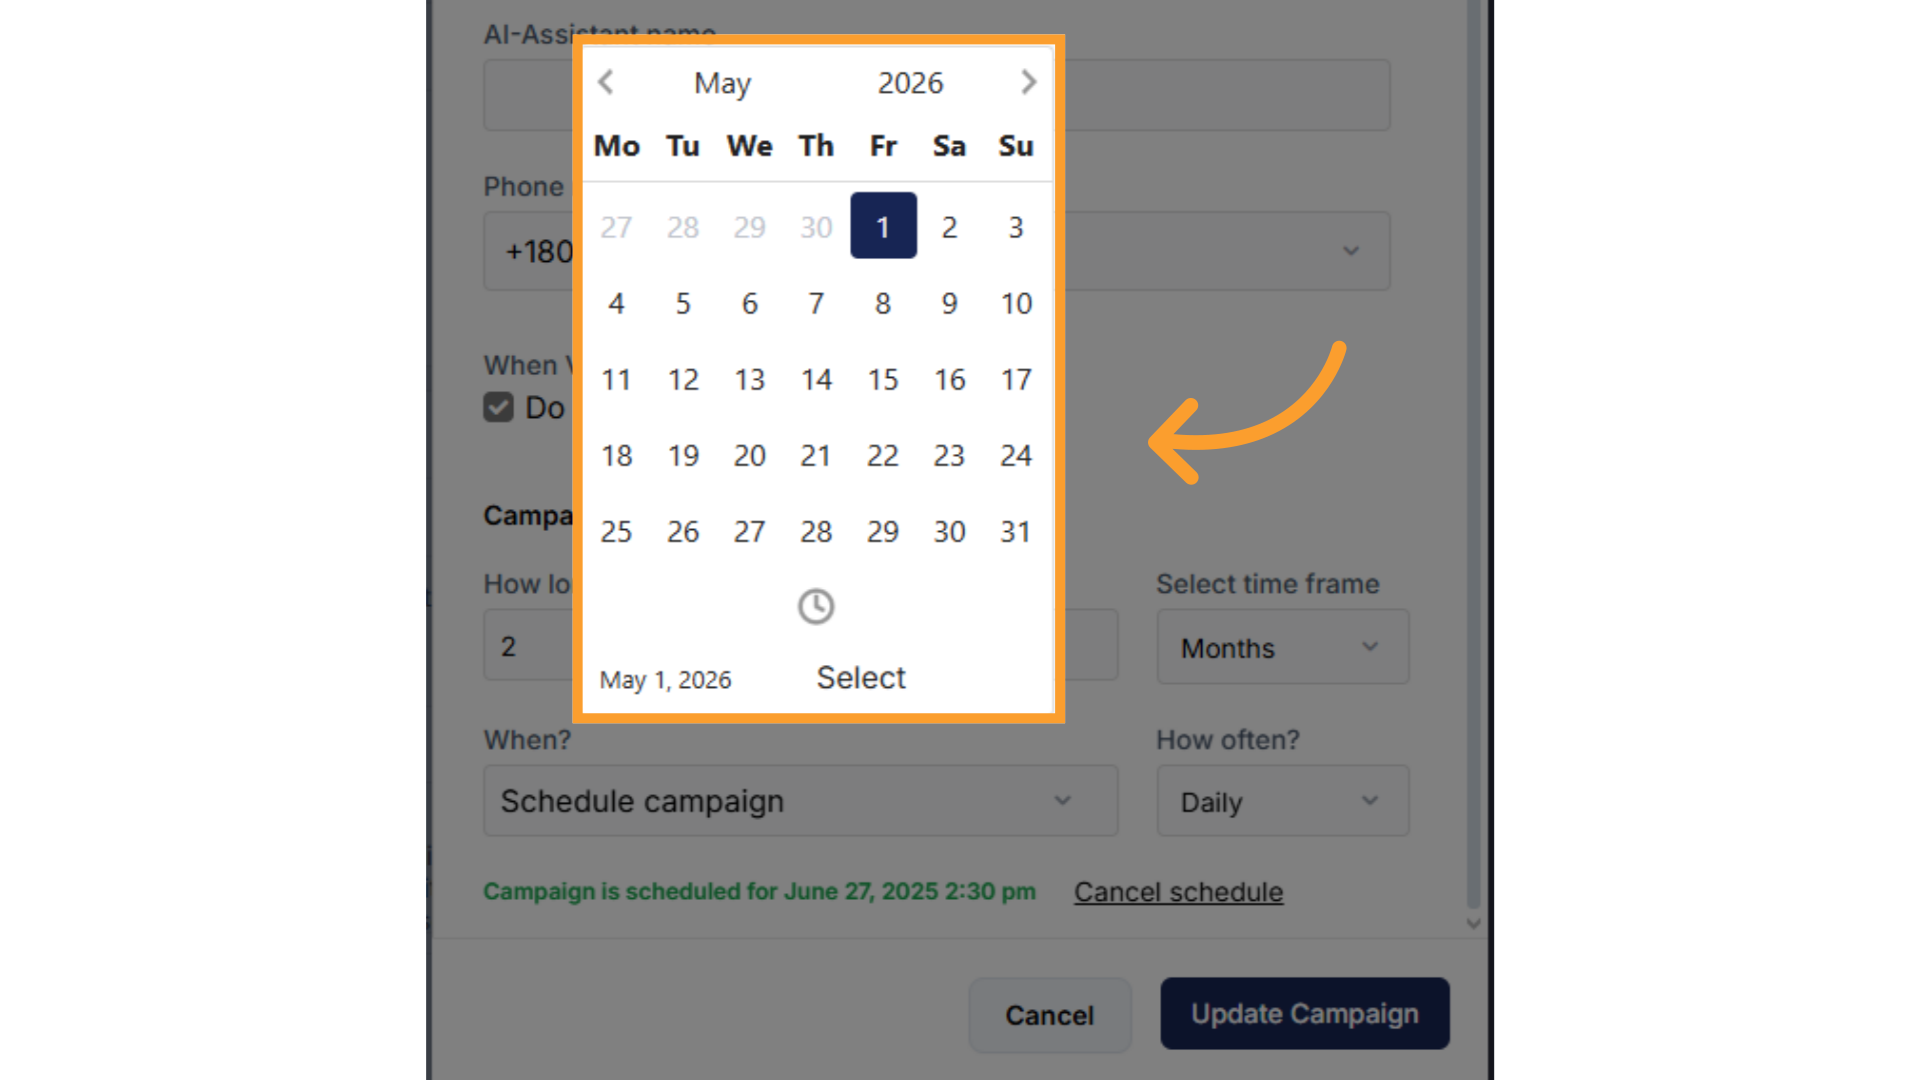
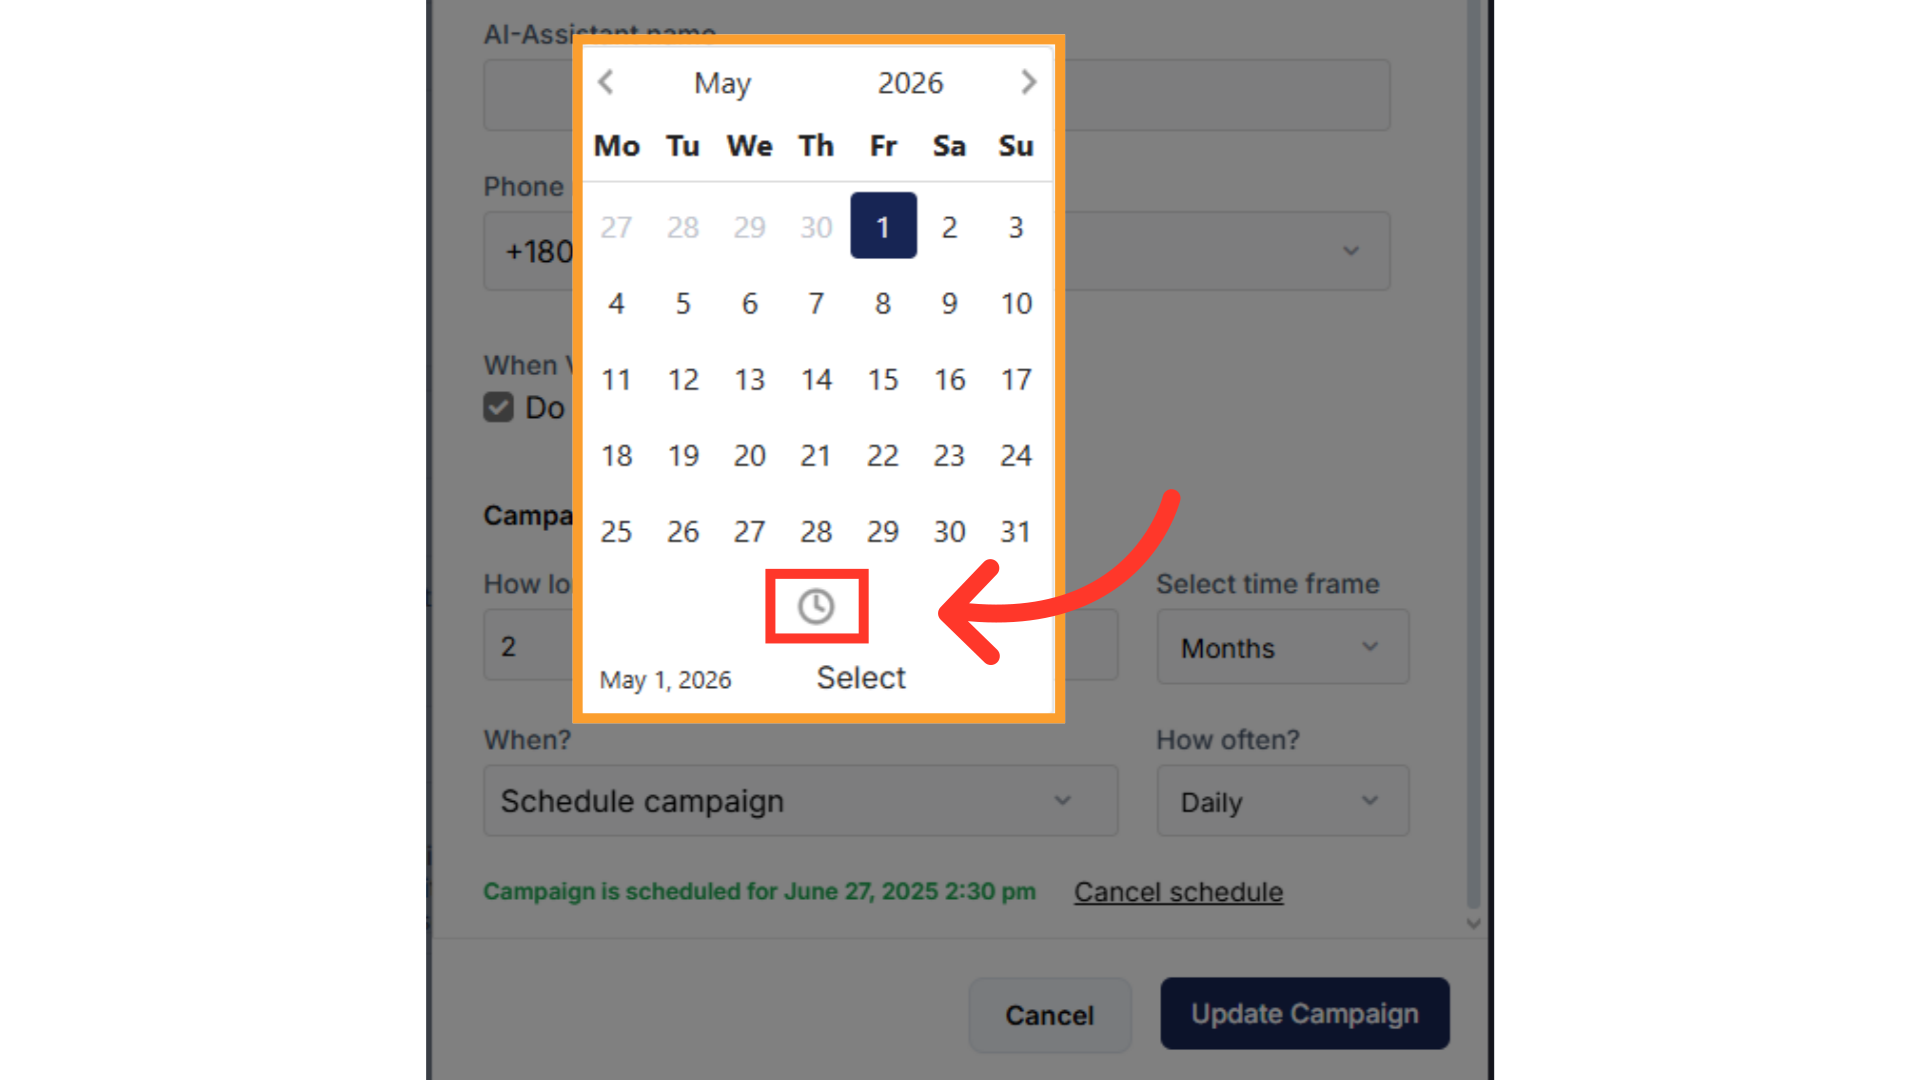
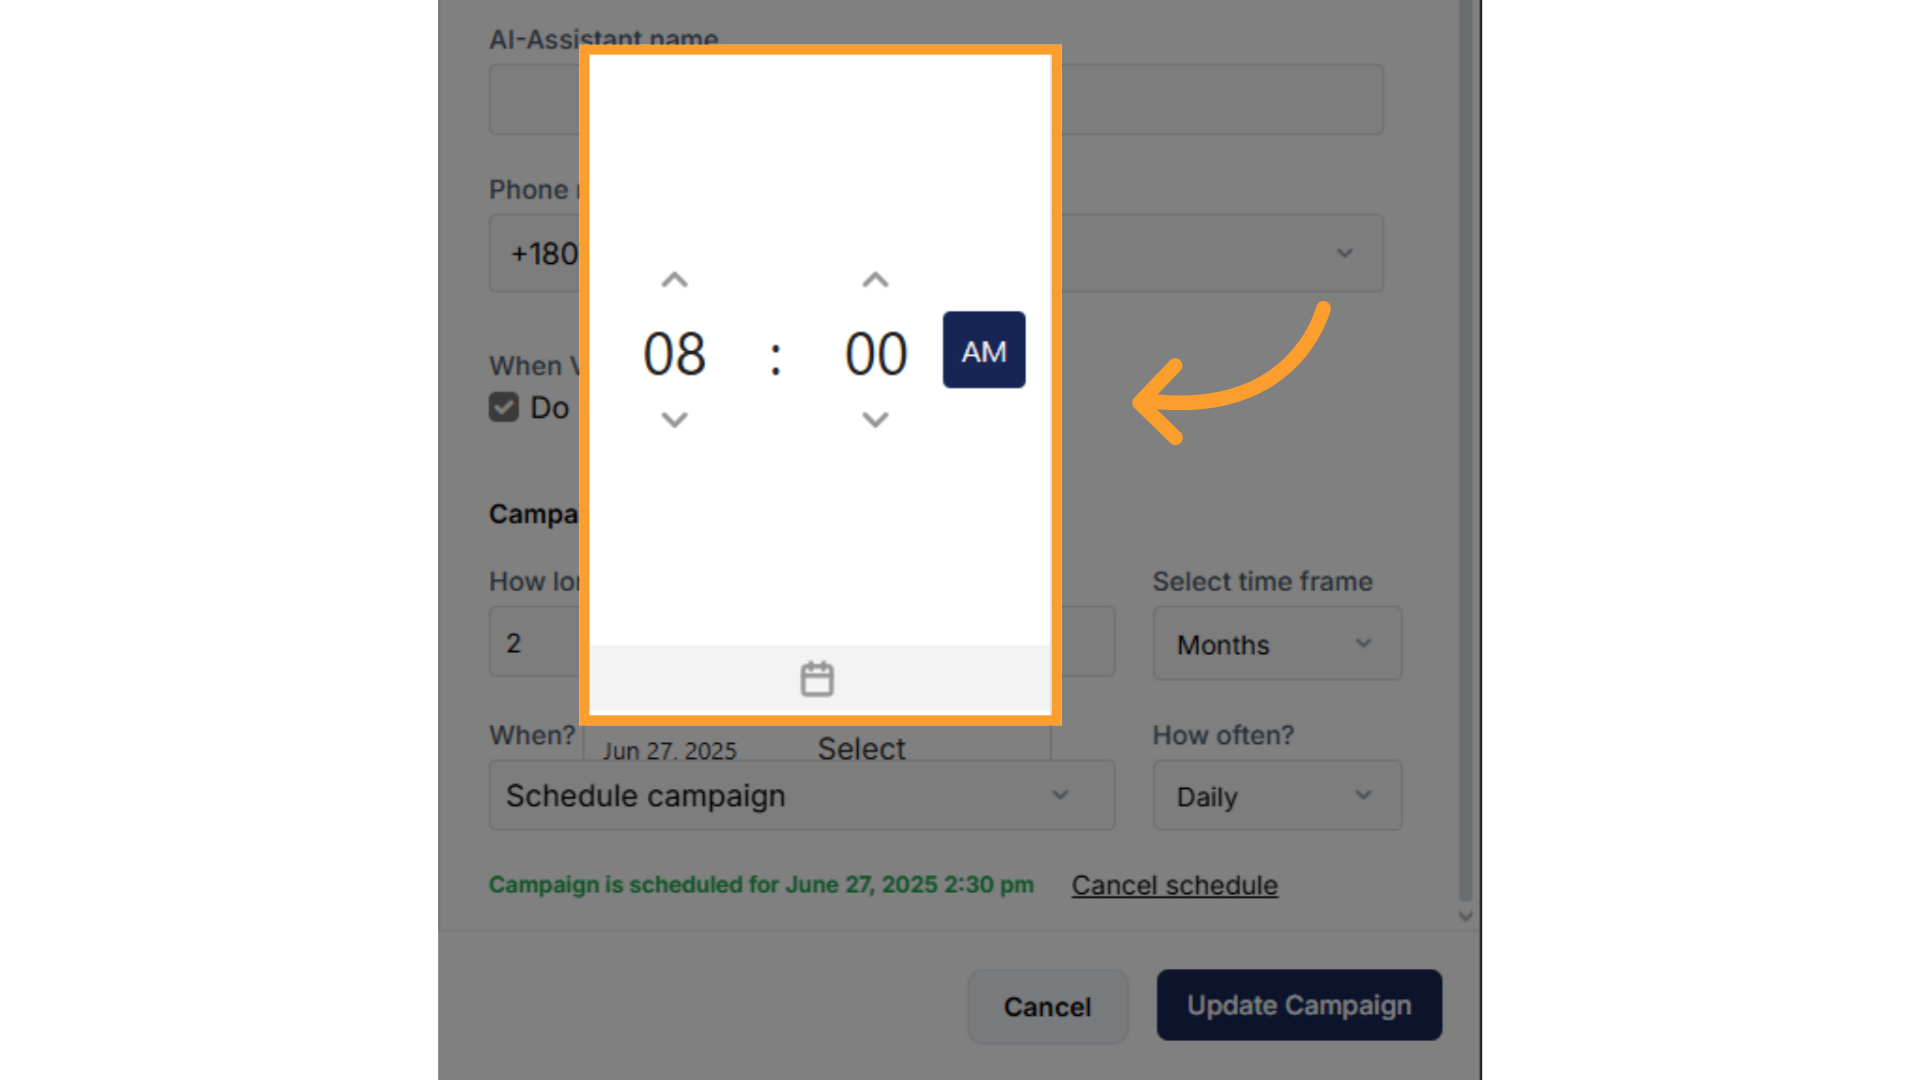
- Select a start time using the clock picker.
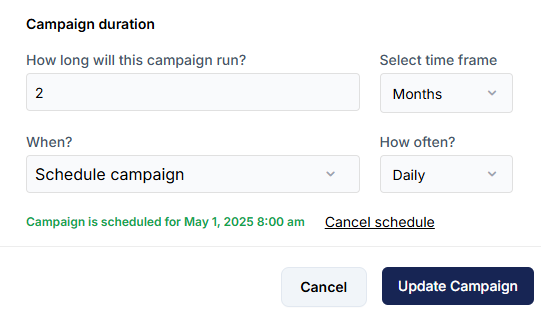
- Under How Long:
- Define how long the campaign should run (hours, days, or months)
- Under How Often:
- Define how frequently calls should occur
- Run daily for 2 months starting on May 1st at 8:00 AM.
Scheduling Calls in GHL
GHL
GHL
1. Create or Select a Workflow in GHL
- Go to the Automations tab in your GHL account.
- Either:
- Click Create Workflow to make a new one, or
- Select an existing workflow that includes a Dynamic Outbound Call.
- For manual execution:
- Ensure the workflow does not have a trigger.
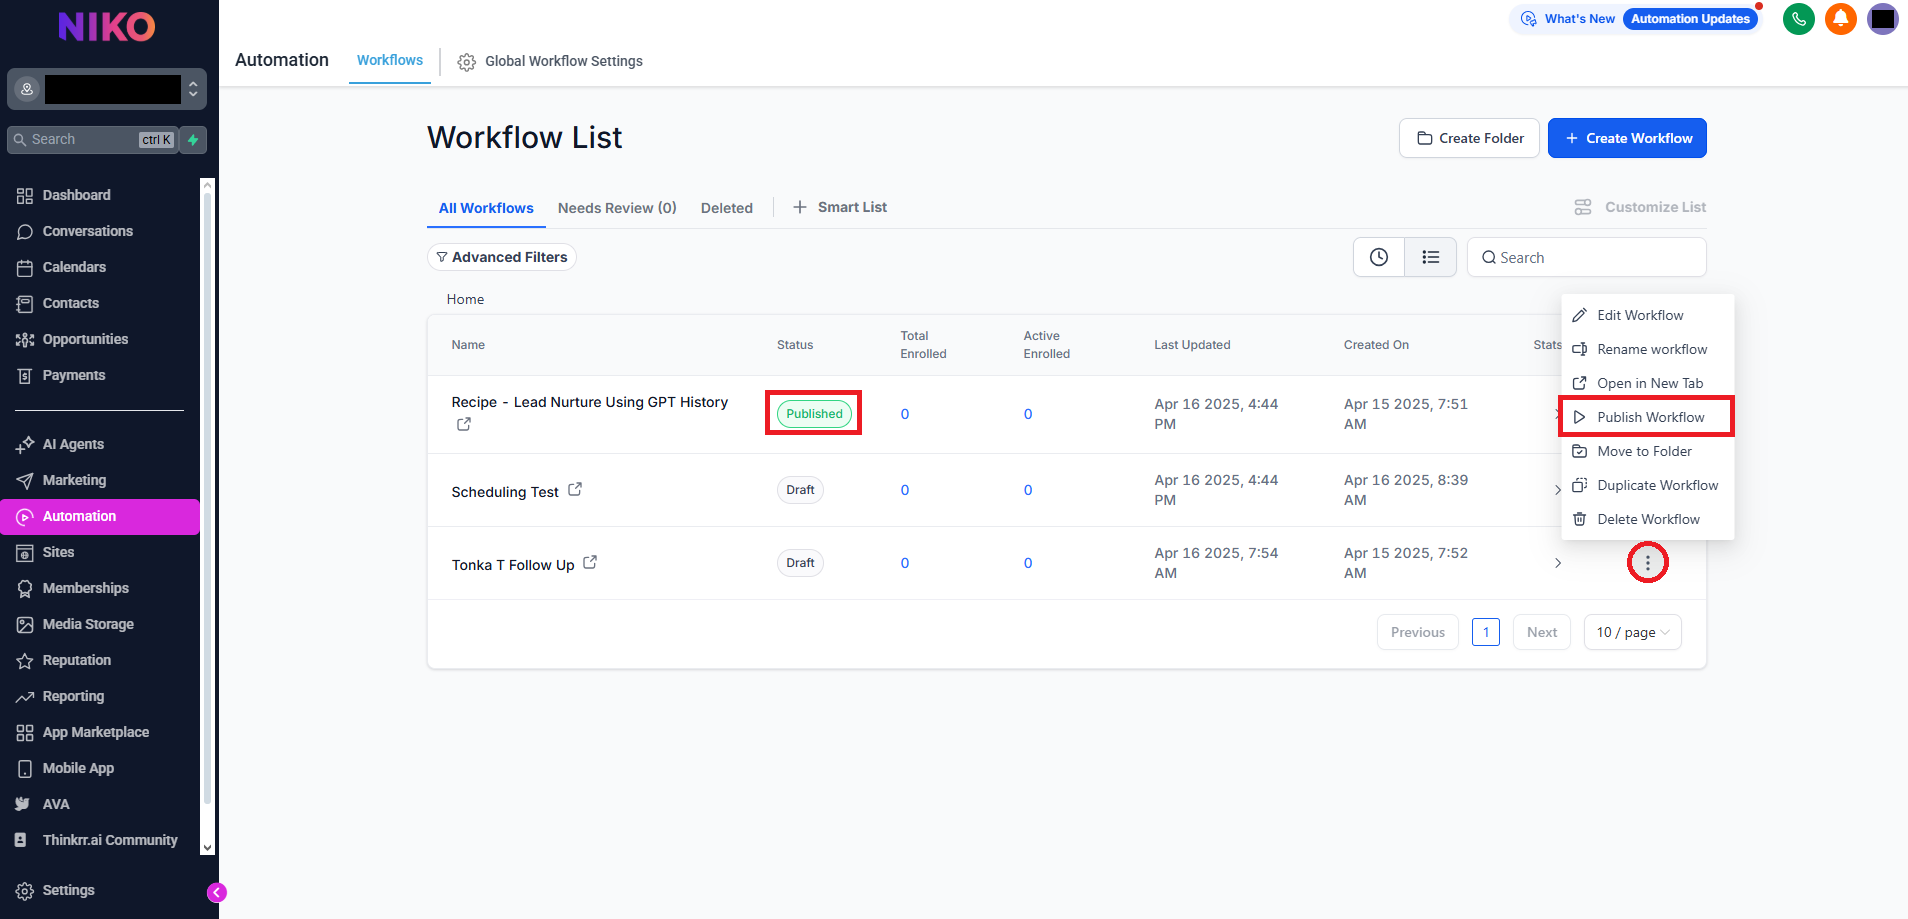
- Make sure the workflow is Published, not in Draft mode.
- To publish:
- Click the three dots icon on the workflow.
- Select Publish Workflow from the dropdown menu.
- To publish:
- If you’re unsure how to set this up, refer to: Integrations with GHL > thinkrr in GHL
2. Add Contacts to Automation
- Navigate to the Contacts section in GHL.
- Select the contacts you want to include in the outbound project.
- Click Add to Automation.
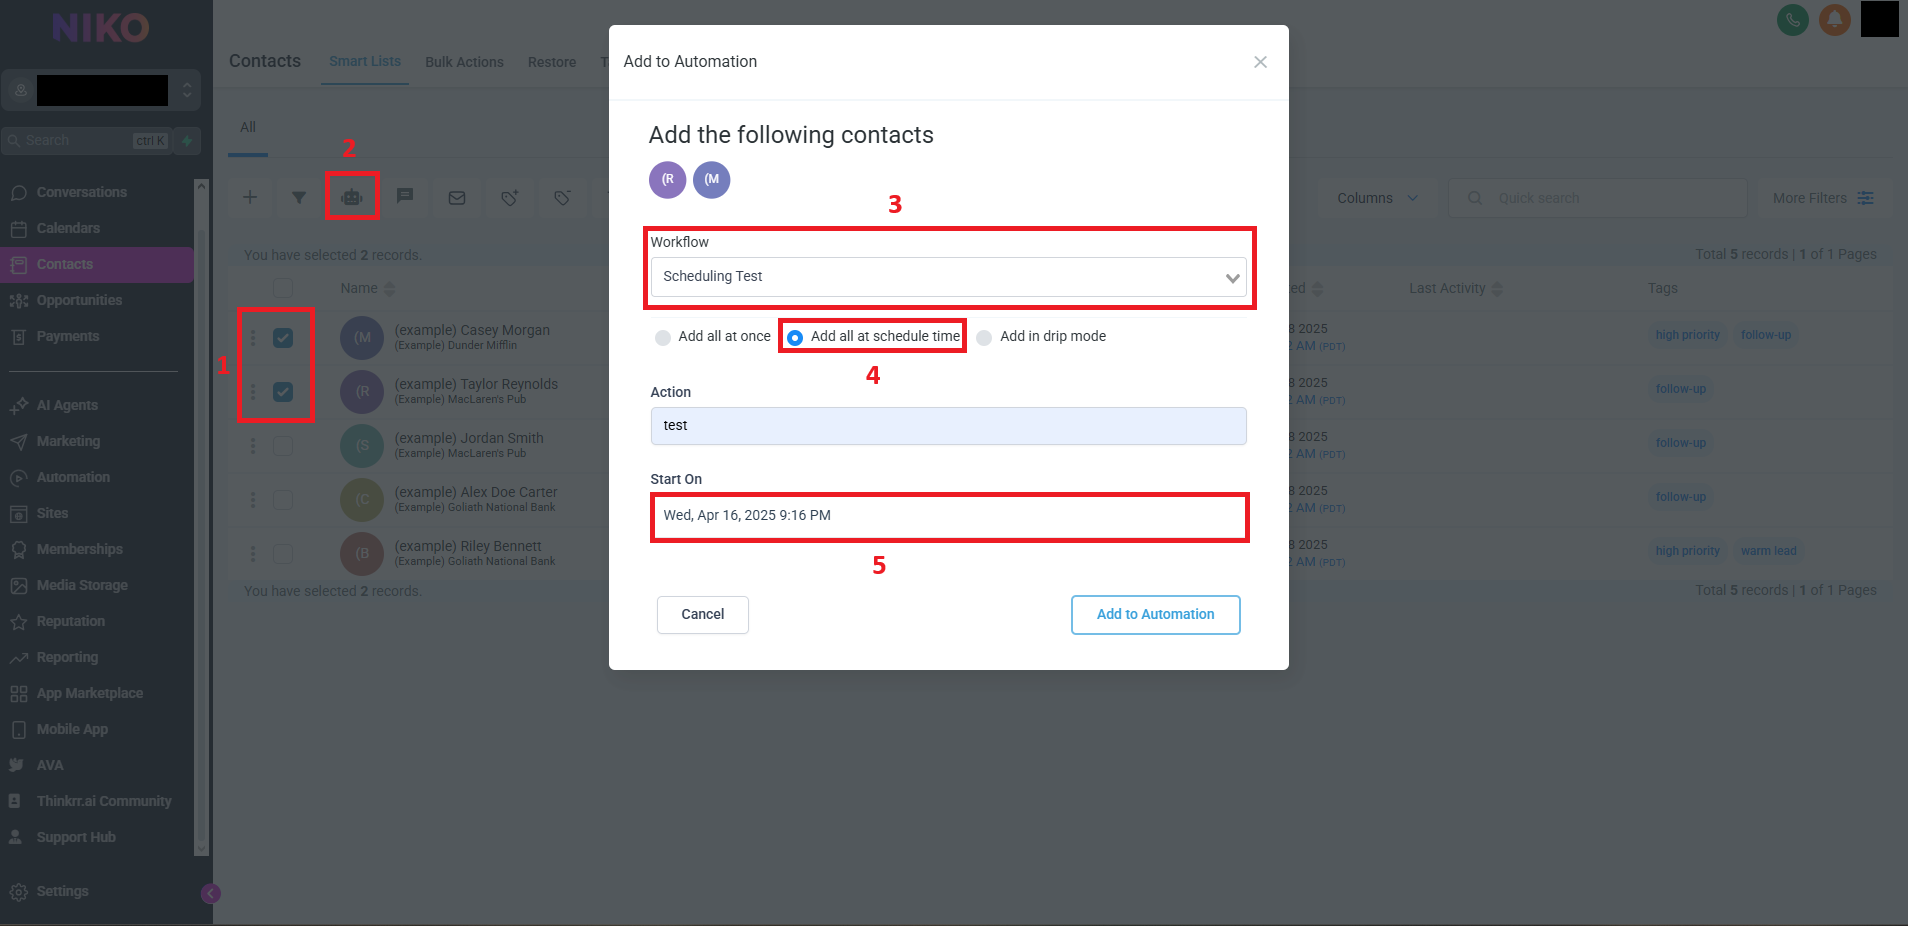
3. Choose Scheduling Options
- In the Add to Automation window:
- Select the desired Published Workflow from the list.
- Choose how to add the contacts:
- Add All at Scheduled Time:
- Allows you to define a start date and time.
- Optionally, fill out the Action Description field.
- Add in Drip Mode (for large volumes):
- Includes all options above, plus:
- Batch Quantity – how many contacts to call per batch.
- Repeat After – time delay between batches.
- Send On – days of the week to process batches.
- Process Between – define a time range for calling.
- Includes all options above, plus:
- Add All at Scheduled Time:
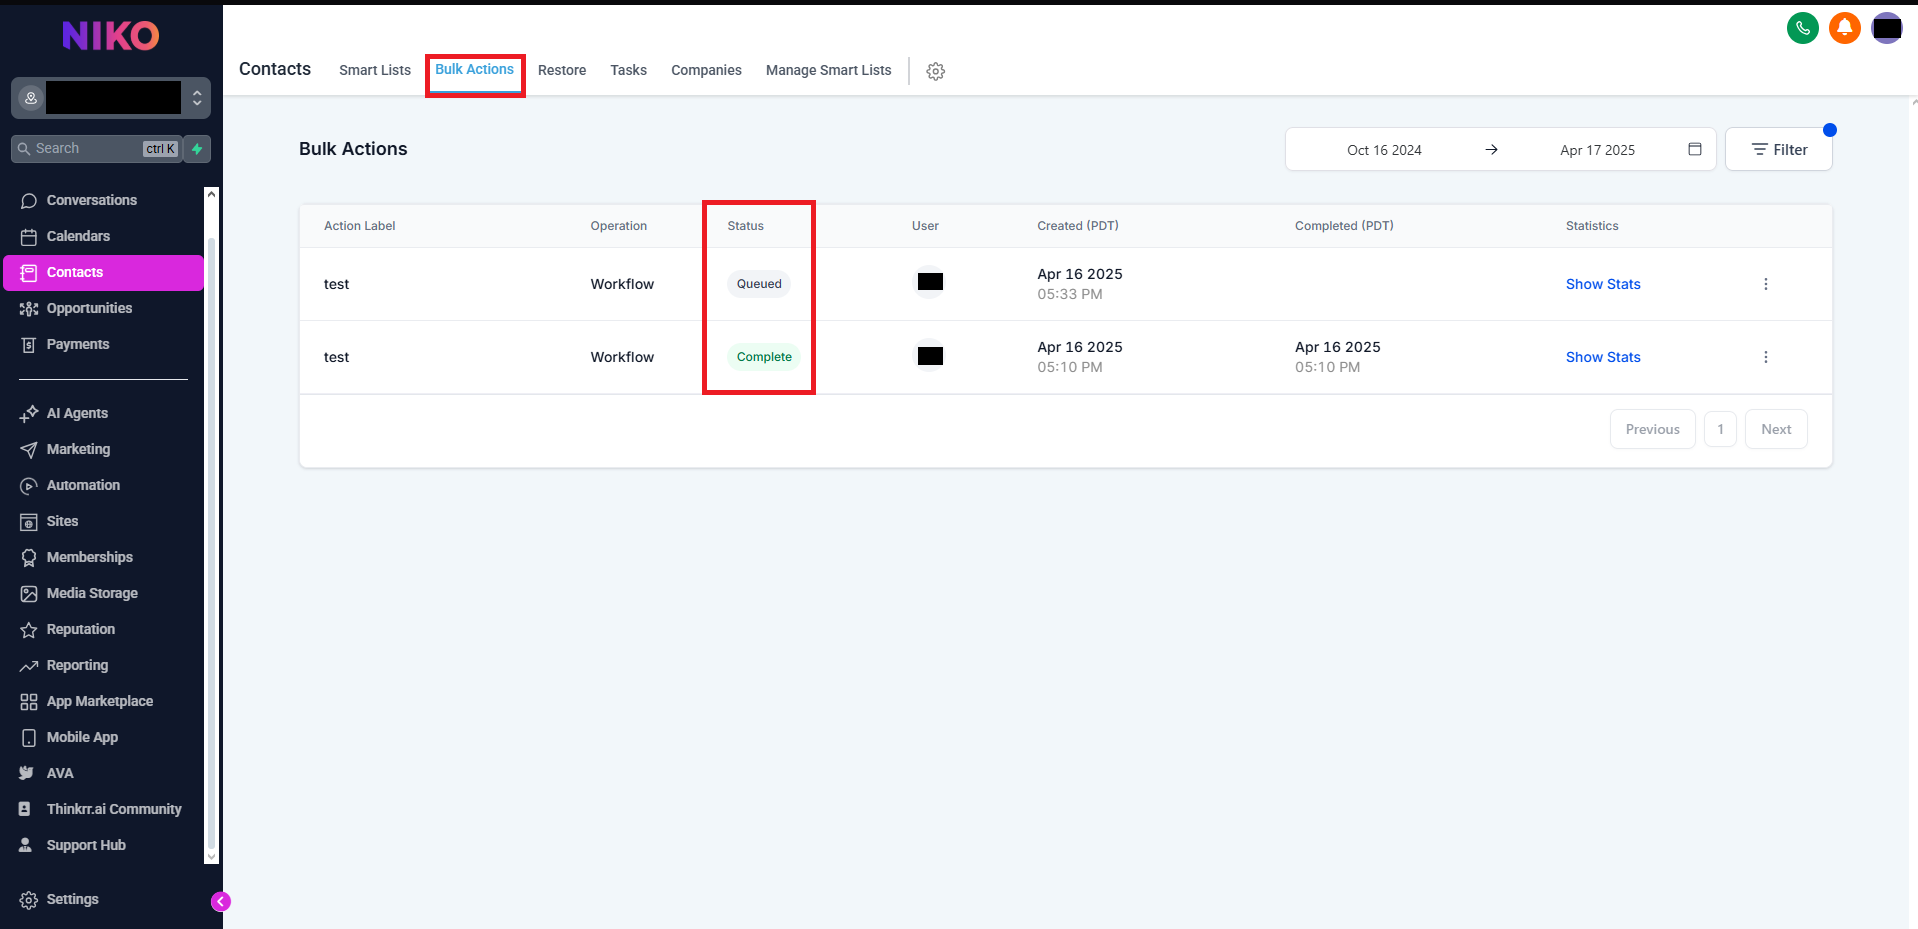
4. Execute and Monitor Automation
- After scheduling your contacts:
- Click Add to Automation to confirm.
- You will be redirected back to the Contacts section under the Bulk Actions tab.
- Here, you can:
- Monitor the status of the bulk action.
- Check whether contacts were successfully added to the workflow.
- Verify execution times and resolve any issues if needed.
Additional Scheduling Considerations
Effective call scheduling goes beyond simply selecting a time and date, it requires aligning system settings with real-world outreach strategy. Regardless of whether you’re using thinkrr’s campaign settings or GHL’s workflow automations, a few strategic considerations can significantly impact results.- Time Zone Awareness: Always schedule calls according to the time zone of your target audience. Misalignment here can lead to missed calls or low engagement.
- Client Availability: Consider when your ideal customers are most likely to answer. For B2B, weekday mornings may perform better; for B2C, evenings or weekends might be ideal.
- System Load Management: When scheduling high-volume campaigns, spread out calls using frequency or batch pacing settings to avoid system overload or delivery issues.
- Platform-Specific Timing Logic: In thinkrr, scheduling is handled within each campaign’s configuration. In GHL, Drip Mode allows finer control over frequency, days, and call time windows.
- Edit Limitations: Once a schedule is active (e.g., campaigns are executed or contacts are added to automation), most platforms lock those parameters. Plan carefully before launching.
FAQs & Troubleshooting
General Questions
How does scheduling in GHL work for outbound calls?
How does scheduling in GHL work for outbound calls?
Scheduling in GHL relies on defining the start date, time, and frequency (e.g., daily, weekly) when enrolling contacts into a published workflow. You can adjust batch sizes and scheduling windows using Drip Mode for large volumes.
Can I manually adjust the scheduling once contacts are enrolled?
Can I manually adjust the scheduling once contacts are enrolled?
No, once contacts are enrolled and scheduled, the campaign will execute as defined in the workflow. You cannot modify the schedule for contacts already in the queue.
Configuration
What happens if I modify a workflow after contacts have been added to automation?
What happens if I modify a workflow after contacts have been added to automation?
Modifications to a workflow after contacts are added will not affect those contacts in the queue. You would need to remove and re-add contacts to apply changes to their schedule.
Are there any limitations when scheduling outbound calls in GHL?
Are there any limitations when scheduling outbound calls in GHL?
Scheduling in GHL is subject to system processing limits, especially when working with large batches. It is recommended to monitor workflow performance for large campaigns to ensure smooth execution.
Usage and Results
Why might a contact not receive a call as scheduled?
Why might a contact not receive a call as scheduled?
Ensure that the workflow is published and that all scheduling parameters (start time, frequency, and batch sizes) are set correctly. Additionally, check if there are any network issues or invalid contact numbers.
How can I track the progress of scheduled calls?
How can I track the progress of scheduled calls?
You can track the status of scheduled calls within the Campaign History or Call Analytics sections of the GHL dashboard. Each entry includes the timestamp, scheduled time, status, and related campaign data.
For additional questions or guidance, try using our Virtual Support Agent! Available 24/7 to help resolve most issues quickly at thinkrr.ai/support. If you still need assistance, visit our support site at help.thinkrr.ai and submit a Ticket or contact our team directly at hello@thinkrr.ai.